Managing Your Infrastructure
Rackscope provides a visual editor for managing your complete infrastructure topology without writing YAML files directly. Every change made through the editor is written back to the YAML configuration files on disk, keeping your configuration in sync and GitOps-friendly.
Overview
The Topology Editor is the primary interface for defining your physical infrastructure. It covers the complete hierarchy from sites down to individual device instances, allowing you to:
- Create and organize sites, rooms, aisles, and racks
- Place devices in racks and assign hardware templates
- Configure Prometheus instance bindings (node names)
- Validate placements with real-time collision detection
URL: /editors/topology
Changes are saved immediately via the API and take effect without restarting the backend. The backend reloads the relevant topology file on each save, so you will see updated health states in the monitoring views within the next refresh cycle.
For rack-level device placement, a dedicated Rack Editor is also available at /editors/rack, described in the Adding Devices to a Rack section below.
Understanding the Hierarchy
Before using the editor, it is important to understand the physical hierarchy that Rackscope models:
Site
└── Room
    └── Aisle
        └── Rack
            └── Device
                └── Instance (Prometheus node name)
| Level | Description | Example |
|---|---|---|
| Site | A physical location (datacenter, campus building) | dc1 — Main Datacenter, Paris |
| Room | A machine room within a site | room-a — Room A |
| Aisle | A row or group of racks within a room | aisle-01 — Compute Aisle |
| Rack | A physical rack enclosure | r01-01 — Rack XH3000 Compute 01 |
| Device | A piece of hardware installed in the rack | r01-01-c01 — XH3140 Trio 01 |
| Instance | The Prometheus scrape target(s) for the device | compute001, compute002, compute003 |
Health states aggregate upward: a CRIT node makes its device CRIT, its rack CRIT, its room CRIT, and its site CRIT. Drilling down from the world map to a device always takes you toward the root cause.
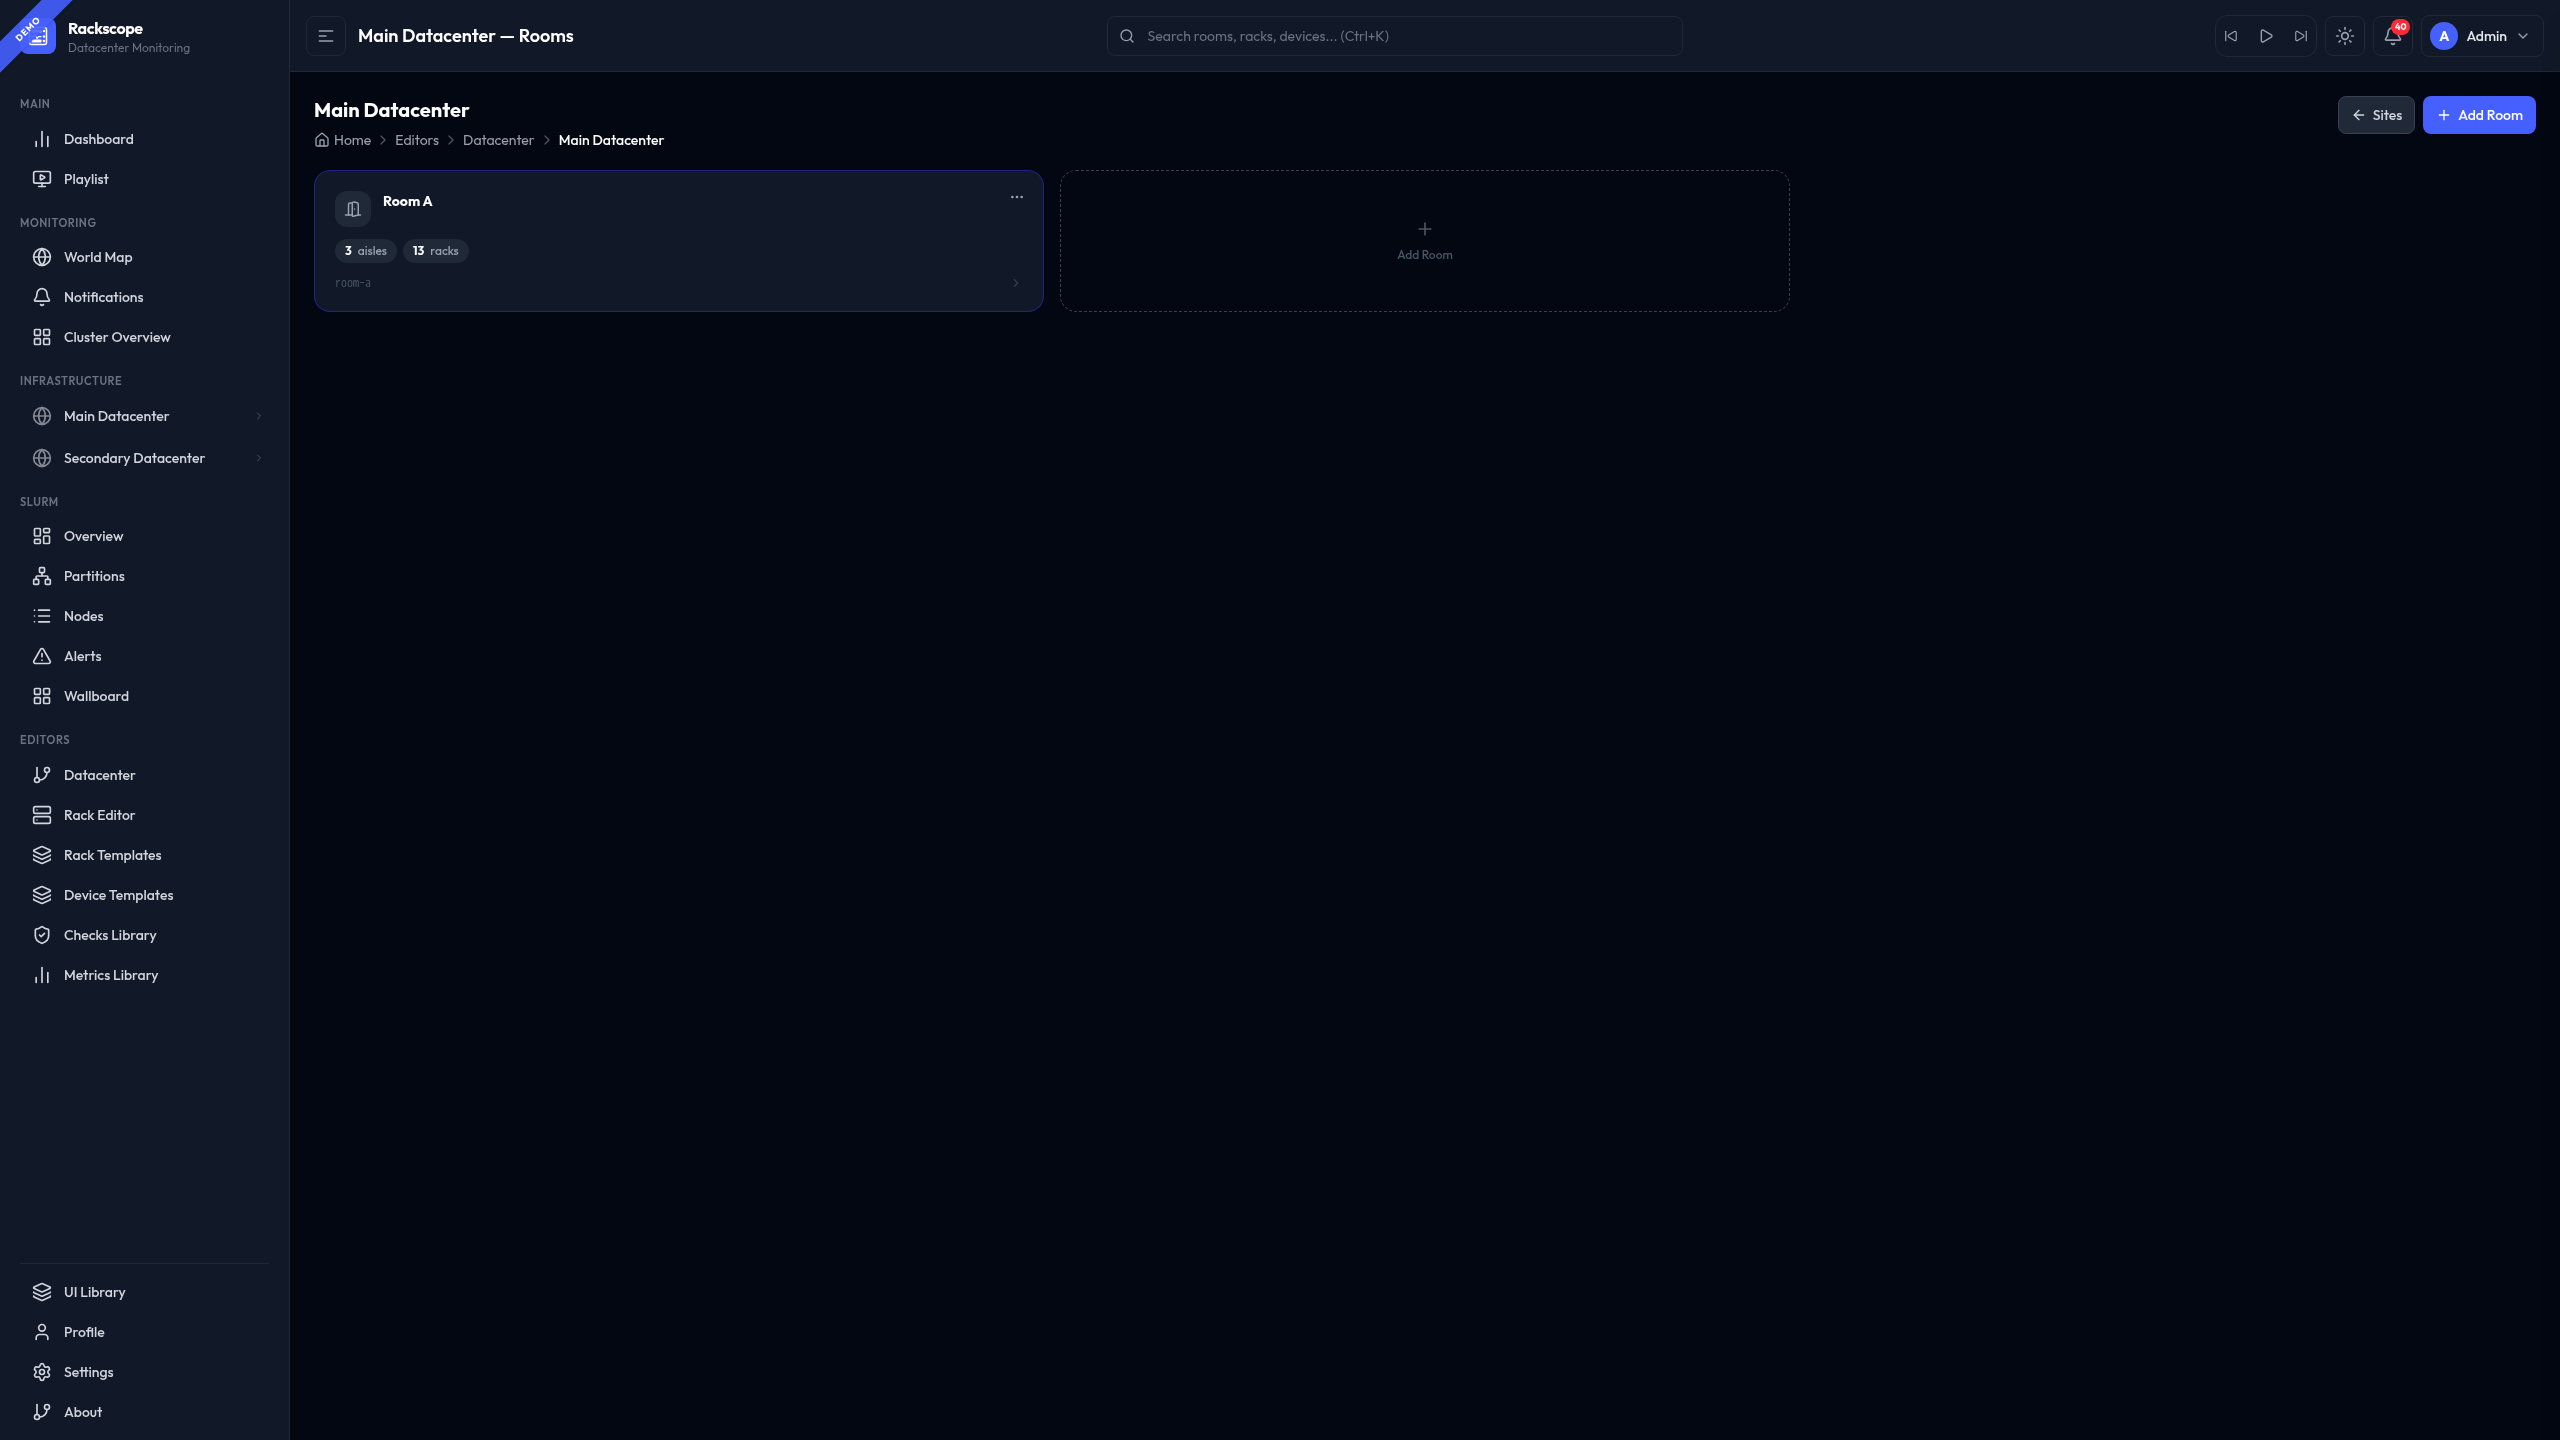
Creating a Site
A site is the top-level entry point in the hierarchy. It maps to a physical location and optionally appears on the world map if coordinates are provided.
Steps
- Open the Topology Editor at
/editors/topology. - In the Sites panel on the left, click + Add Site.
- Fill in the site fields:
| Field | Required | Description | Example |
|---|---|---|---|
id | Yes | Unique identifier. Use lowercase, no spaces. | dc1 |
name | Yes | Human-readable display name. | Main Datacenter |
description | No | Free-text description. | Primary production site |
location.lat | No | Latitude (decimal degrees). Enables world map pin. | 48.8566 |
location.lon | No | Longitude (decimal degrees). | 2.3522 |
location.address | No | Free-text address for display. | Paris, FR |
- Click Save. The site appears in the hierarchy tree immediately.
Equivalent YAML
# config/topology/sites.yaml
sites:
  - id: dc1
    name: Main Datacenter
    description: Primary production site
    location:
      lat: 48.8566
      lon: 2.3522
      address: Paris, FR
    rooms:
      - id: room-a
        name: Room A
Sites without location.lat and location.lon do not appear on the world map but are fully functional in all other views.
Creating a Room
A room is a machine room within a site. Each room can have a floor plan layout defined, which enables the graphical room view showing racks on a 2D grid.
Steps
- Select a site in the hierarchy tree.
- Click + Add Room in the Rooms section.
- Fill in the room fields:
| Field | Required | Description | Example |
|---|---|---|---|
id | Yes | Unique identifier within the site. | room-a |
name | Yes | Display name. | Room A |
layout.shape | No | Room footprint shape. Use rectangle. | rectangle |
layout.size.width | No | Room width in grid cells. | 36 |
layout.size.height | No | Room depth in grid cells. | 22 |
layout.orientation.north | No | Direction of map north. | top |
layout.door.side | No | Wall where the main entrance is. | west |
layout.door.label | No | Label shown on the floor plan. | Entrance A |
layout.door.position | No | Fractional position along the wall (0.0–1.0). | 0.25 |
- Click Save.
Equivalent YAML
# config/topology/datacenters/dc1/rooms/room-a/room.yaml
id: room-a
name: Room A
layout:
  shape: rectangle
  size:
    width: 36
    height: 22
  orientation:
    north: top
  grid:
    enabled: true
    cell: 28
  door:
    side: west
    label: Entrance A
    position: 0.25
aisles:
  - id: aisle-01
    name: Aisle 01 (Compute)
standalone_racks: []
The layout.grid.cell value controls the pixel size of each grid cell in the floor plan view. Leave it at the default (28) unless you are working with an unusually large or small room.
Adding Aisles
An aisle is an ordered list of racks. Aisles are used to group racks logically (compute aisle, storage aisle, management aisle) and provide the physical ordering that the Slurm wallboard uses for compact cluster views.
Steps
- Select a room in the hierarchy tree.
- Click + Add Aisle in the Aisles section.
- Fill in the aisle fields:
| Field | Required | Description | Example |
|---|---|---|---|
id | Yes | Unique identifier within the room. | aisle-01 |
name | Yes | Display name. | Aisle 01 (Compute) |
- Click Save.
Racks are assigned to aisles when you create the rack (see the next section). You can also drag racks between aisles in the topology editor to reorganize your layout.
Equivalent YAML
# config/topology/datacenters/dc1/rooms/room-a/aisles/aisle-01/aisle.yaml
id: aisle-01
name: Aisle 01 (Compute)
racks:
  - r01-01
  - r01-02
  - r01-03
The racks list defines the display order in aisle views. The first rack listed is shown at the left of the aisle.
Creating Racks
A rack is a physical enclosure. Each rack has a U height (the number of rack units available for devices) and an optional rack template that defines built-in infrastructure like PDUs or cooling components mounted on the rails.
Steps
- Select an aisle in the hierarchy tree.
- Click + Add Rack in the Racks section.
- Fill in the rack fields:
| Field | Required | Description | Example |
|---|---|---|---|
id | Yes | Globally unique identifier. | r01-01 |
name | Yes | Display name. | Rack XH3000 Compute 01 |
template_id | No | Rack template for built-in infrastructure. | standard-42u-air |
aisle_id | Auto | Set automatically from the parent aisle. | aisle-01 |
- Click Save.
If you assign a rack template (for example standard-42u-air), the rack will automatically include the PDU components and any infrastructure defined in that template. The U height is inherited from the template; you do not need to set it separately.
Equivalent YAML
# config/topology/datacenters/dc1/rooms/room-a/aisles/aisle-01/racks/r01-01.yaml
id: r01-01
name: Rack XH3000 Compute 01
template_id: bull-xh3000
aisle_id: aisle-01
devices: []
Adding Devices to a Rack
Devices are the individual pieces of hardware installed in a rack. Each device occupies one or more rack units (U positions) and is associated with a device template that defines its physical dimensions, layout, and which health checks and metrics apply to it.
The Rack Editor provides a visual front/rear view of the rack with drag-and-drop device placement.
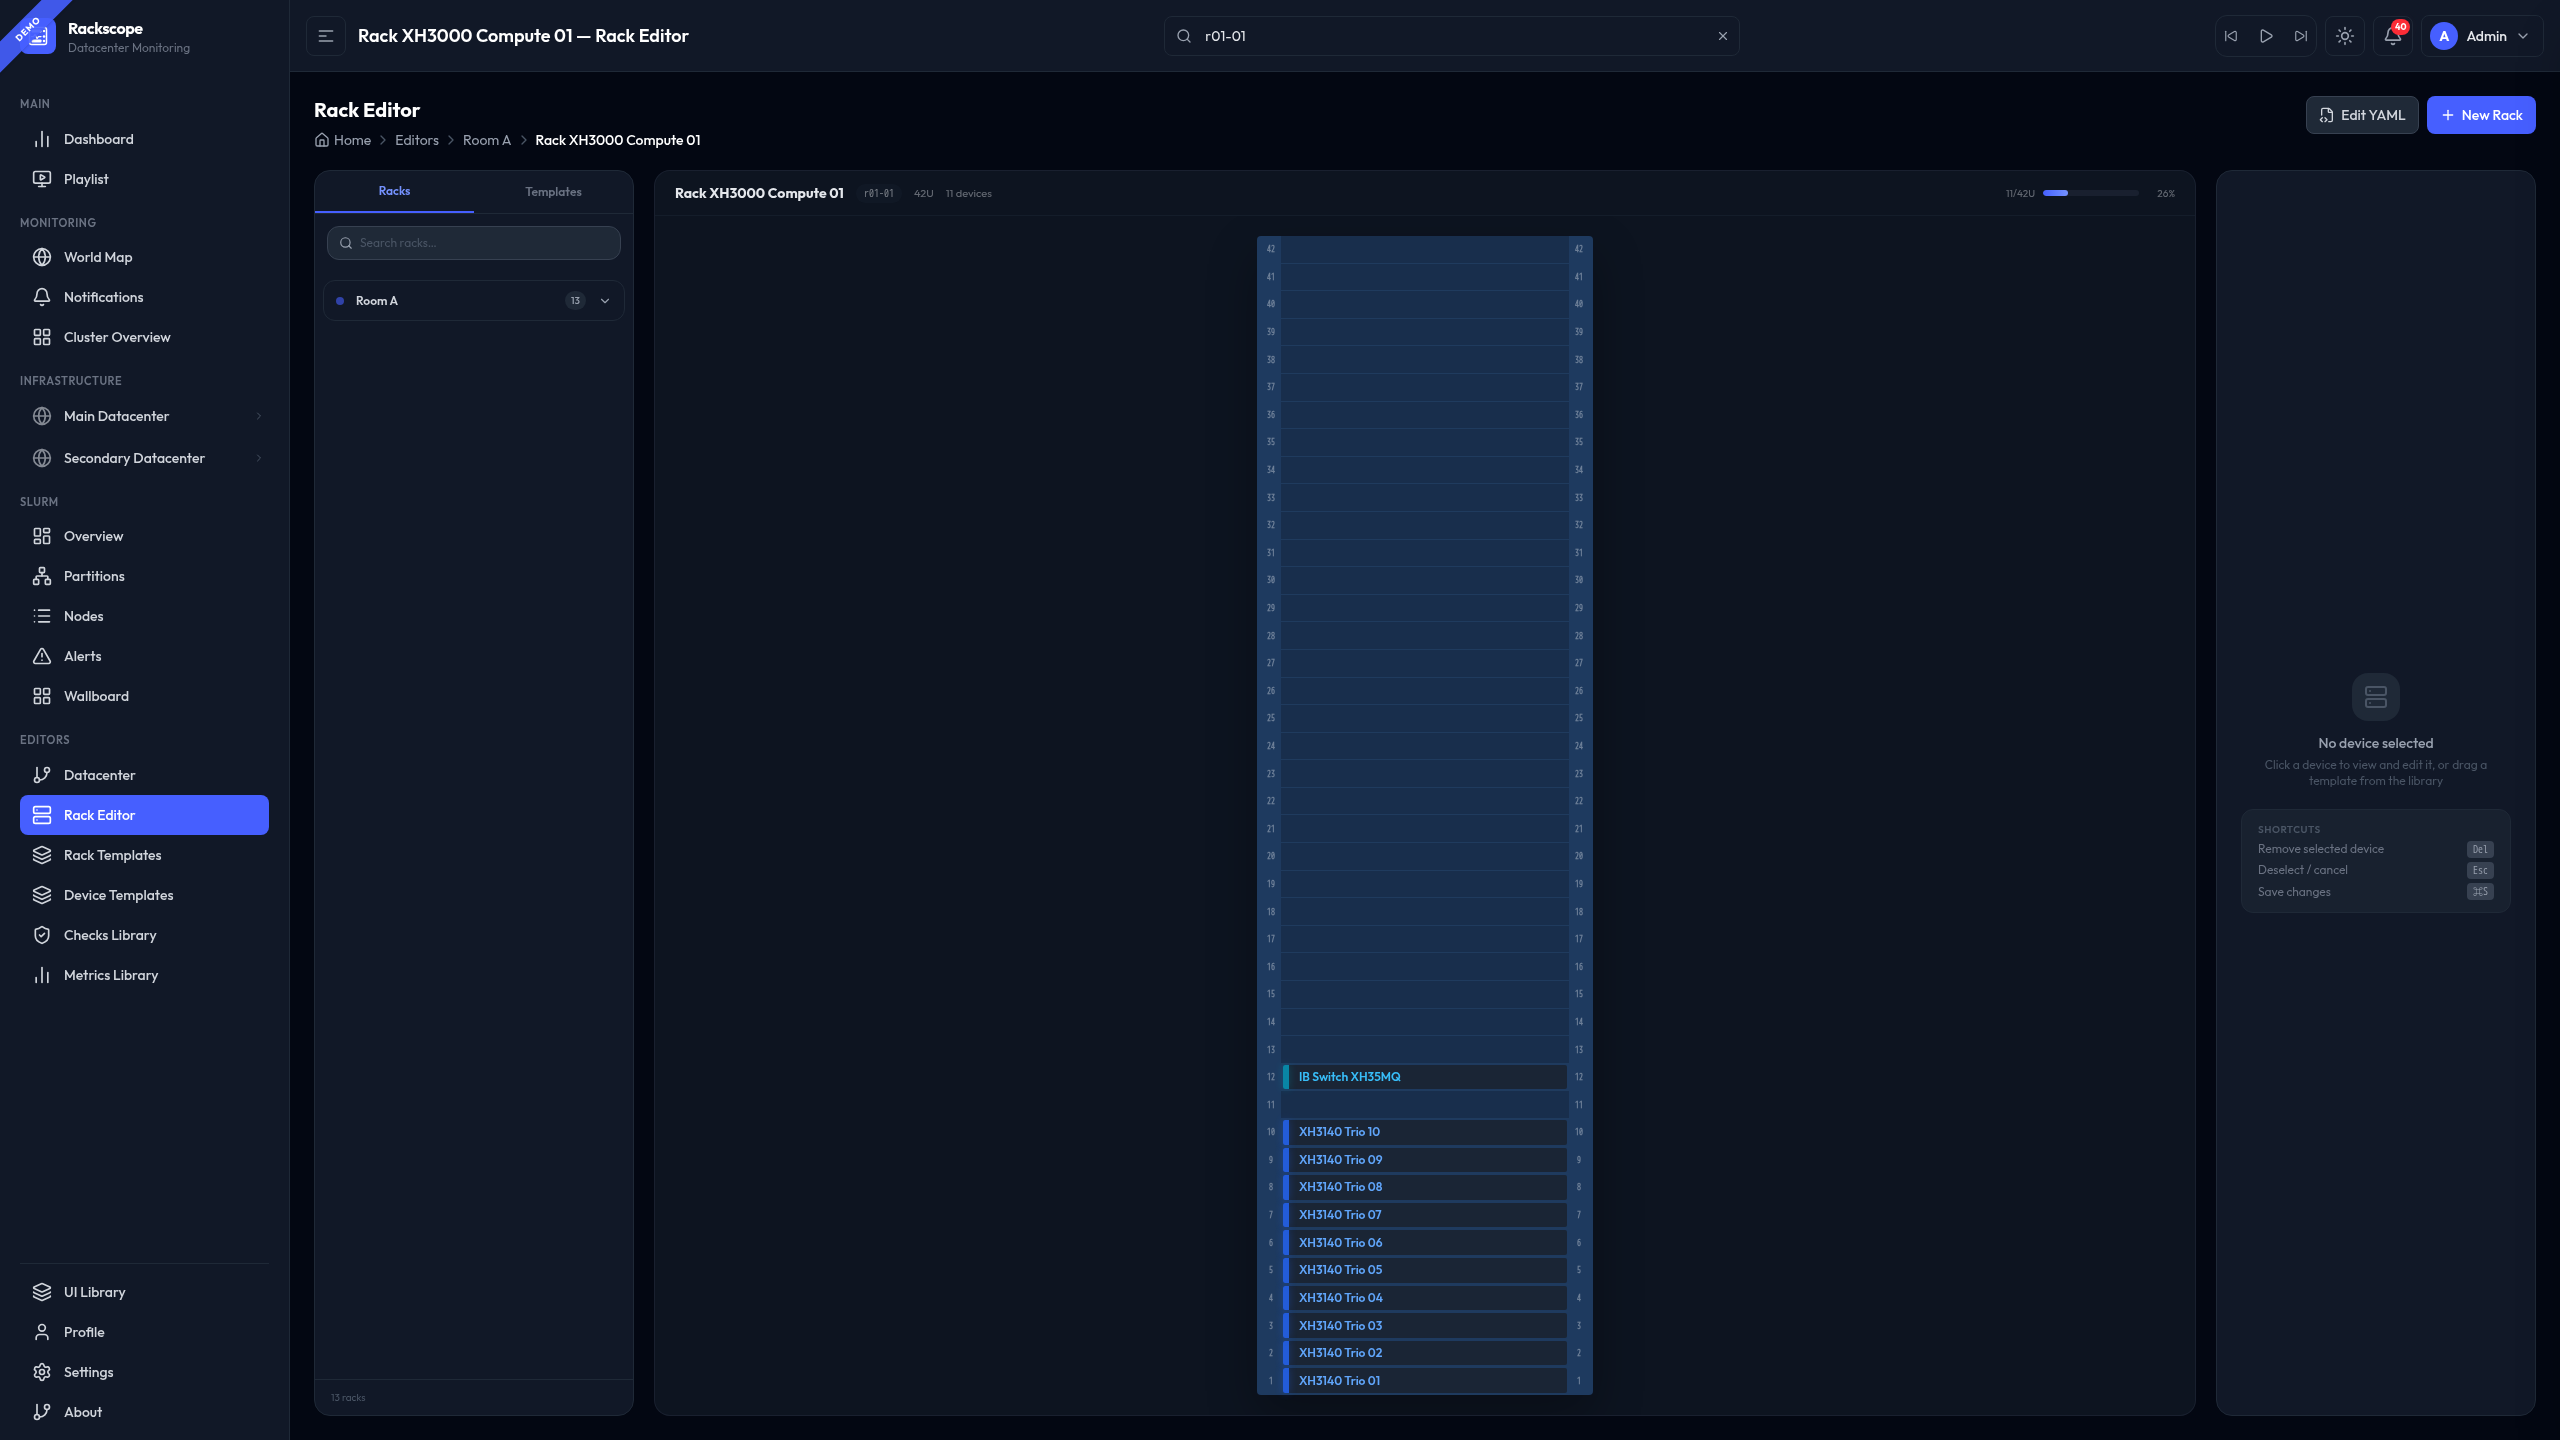
URL: /editors/rack
Steps
- Navigate to the rack view for the rack you want to edit, then click Edit Rack in the toolbar. Alternatively, open
/editors/rackand select the rack from the dropdown. - The rack editor shows the front view as an empty grid of U slots.
- Click + Add Device in the device panel.
- Fill in the device fields:
| Field | Required | Description | Example |
|---|---|---|---|
id | Yes | Unique identifier within the rack. | r01-01-c01 |
name | Yes | Display name for the device. | XH3140 Trio 01 |
template_id | Yes | Device template to use. | bs-xh3140-trio-1u-3n |
u_position | Yes | Bottom U unit where the device starts (1 = rack bottom). | 1 |
instance | Yes | Prometheus instance binding (see formats below). | compute[001-003] |
- As you enter a U position, the editor validates that the device fits within the rack bounds and does not collide with another device already placed at those U slots. Collisions are shown with a red highlight.
- Click Save. The device appears in the rack view immediately.
Instance Formats
The instance field tells Rackscope which Prometheus scrape target(s) correspond to this device. Three formats are supported:
Pattern (Recommended for numbered sequences)
A pattern string using bracket notation expands into a sequence of instance names. Zero-padding is preserved.
instance: "compute[001-003]"
# Expands to: compute001, compute002, compute003
instance: "node[01-20]"
# Expands to: node01, node02, ..., node20
Use this format when your node naming follows a numeric sequence. It is the most compact and readable option.
Explicit List
An explicit list of instance names, one per line. Use this format when node names do not follow a simple numeric sequence.
instance:
  - compute007
  - compute008
  - compute009
instance:
  - login-node
  - backup-server
  - management01
Slot Map
A dictionary mapping physical slot numbers to instance names. Use this for multi-node chassis where each slot has a distinct name and the slot number is meaningful for the physical layout.
instance:
  "1": blade-node-01
  "2": blade-node-02
  "3": blade-node-03
  "4": blade-node-04
The slot numbers in the map correspond to the slot positions defined in the device template's layout.matrix. This allows the rack visualizer to render each node in its correct physical slot within the chassis grid.
Instance Format Quick Reference
| Format | When to use | Example |
|---|---|---|
| Pattern string | Numbered sequences | "compute[001-020]" |
| Explicit list | Non-sequential names | ["login", "backup", "mgmt01"] |
| Slot map | Chassis with slot-to-name mapping | {"1": "node01", "2": "node02"} |
The instance field replaces the older nodes field. If you encounter nodes: in existing configuration files, it is a deprecated alias that still works but should be updated to instance: in new configurations.
Editing Device Templates
Device templates define the hardware characteristics of a device type: its physical dimensions (U height), visual layout (chassis grid for multi-node devices), default checks, and metrics. Templates are reused across many racks, so a change to a template immediately affects all devices using it.
The Templates Editor provides a YAML editor for device templates, rack templates, and rack component templates.
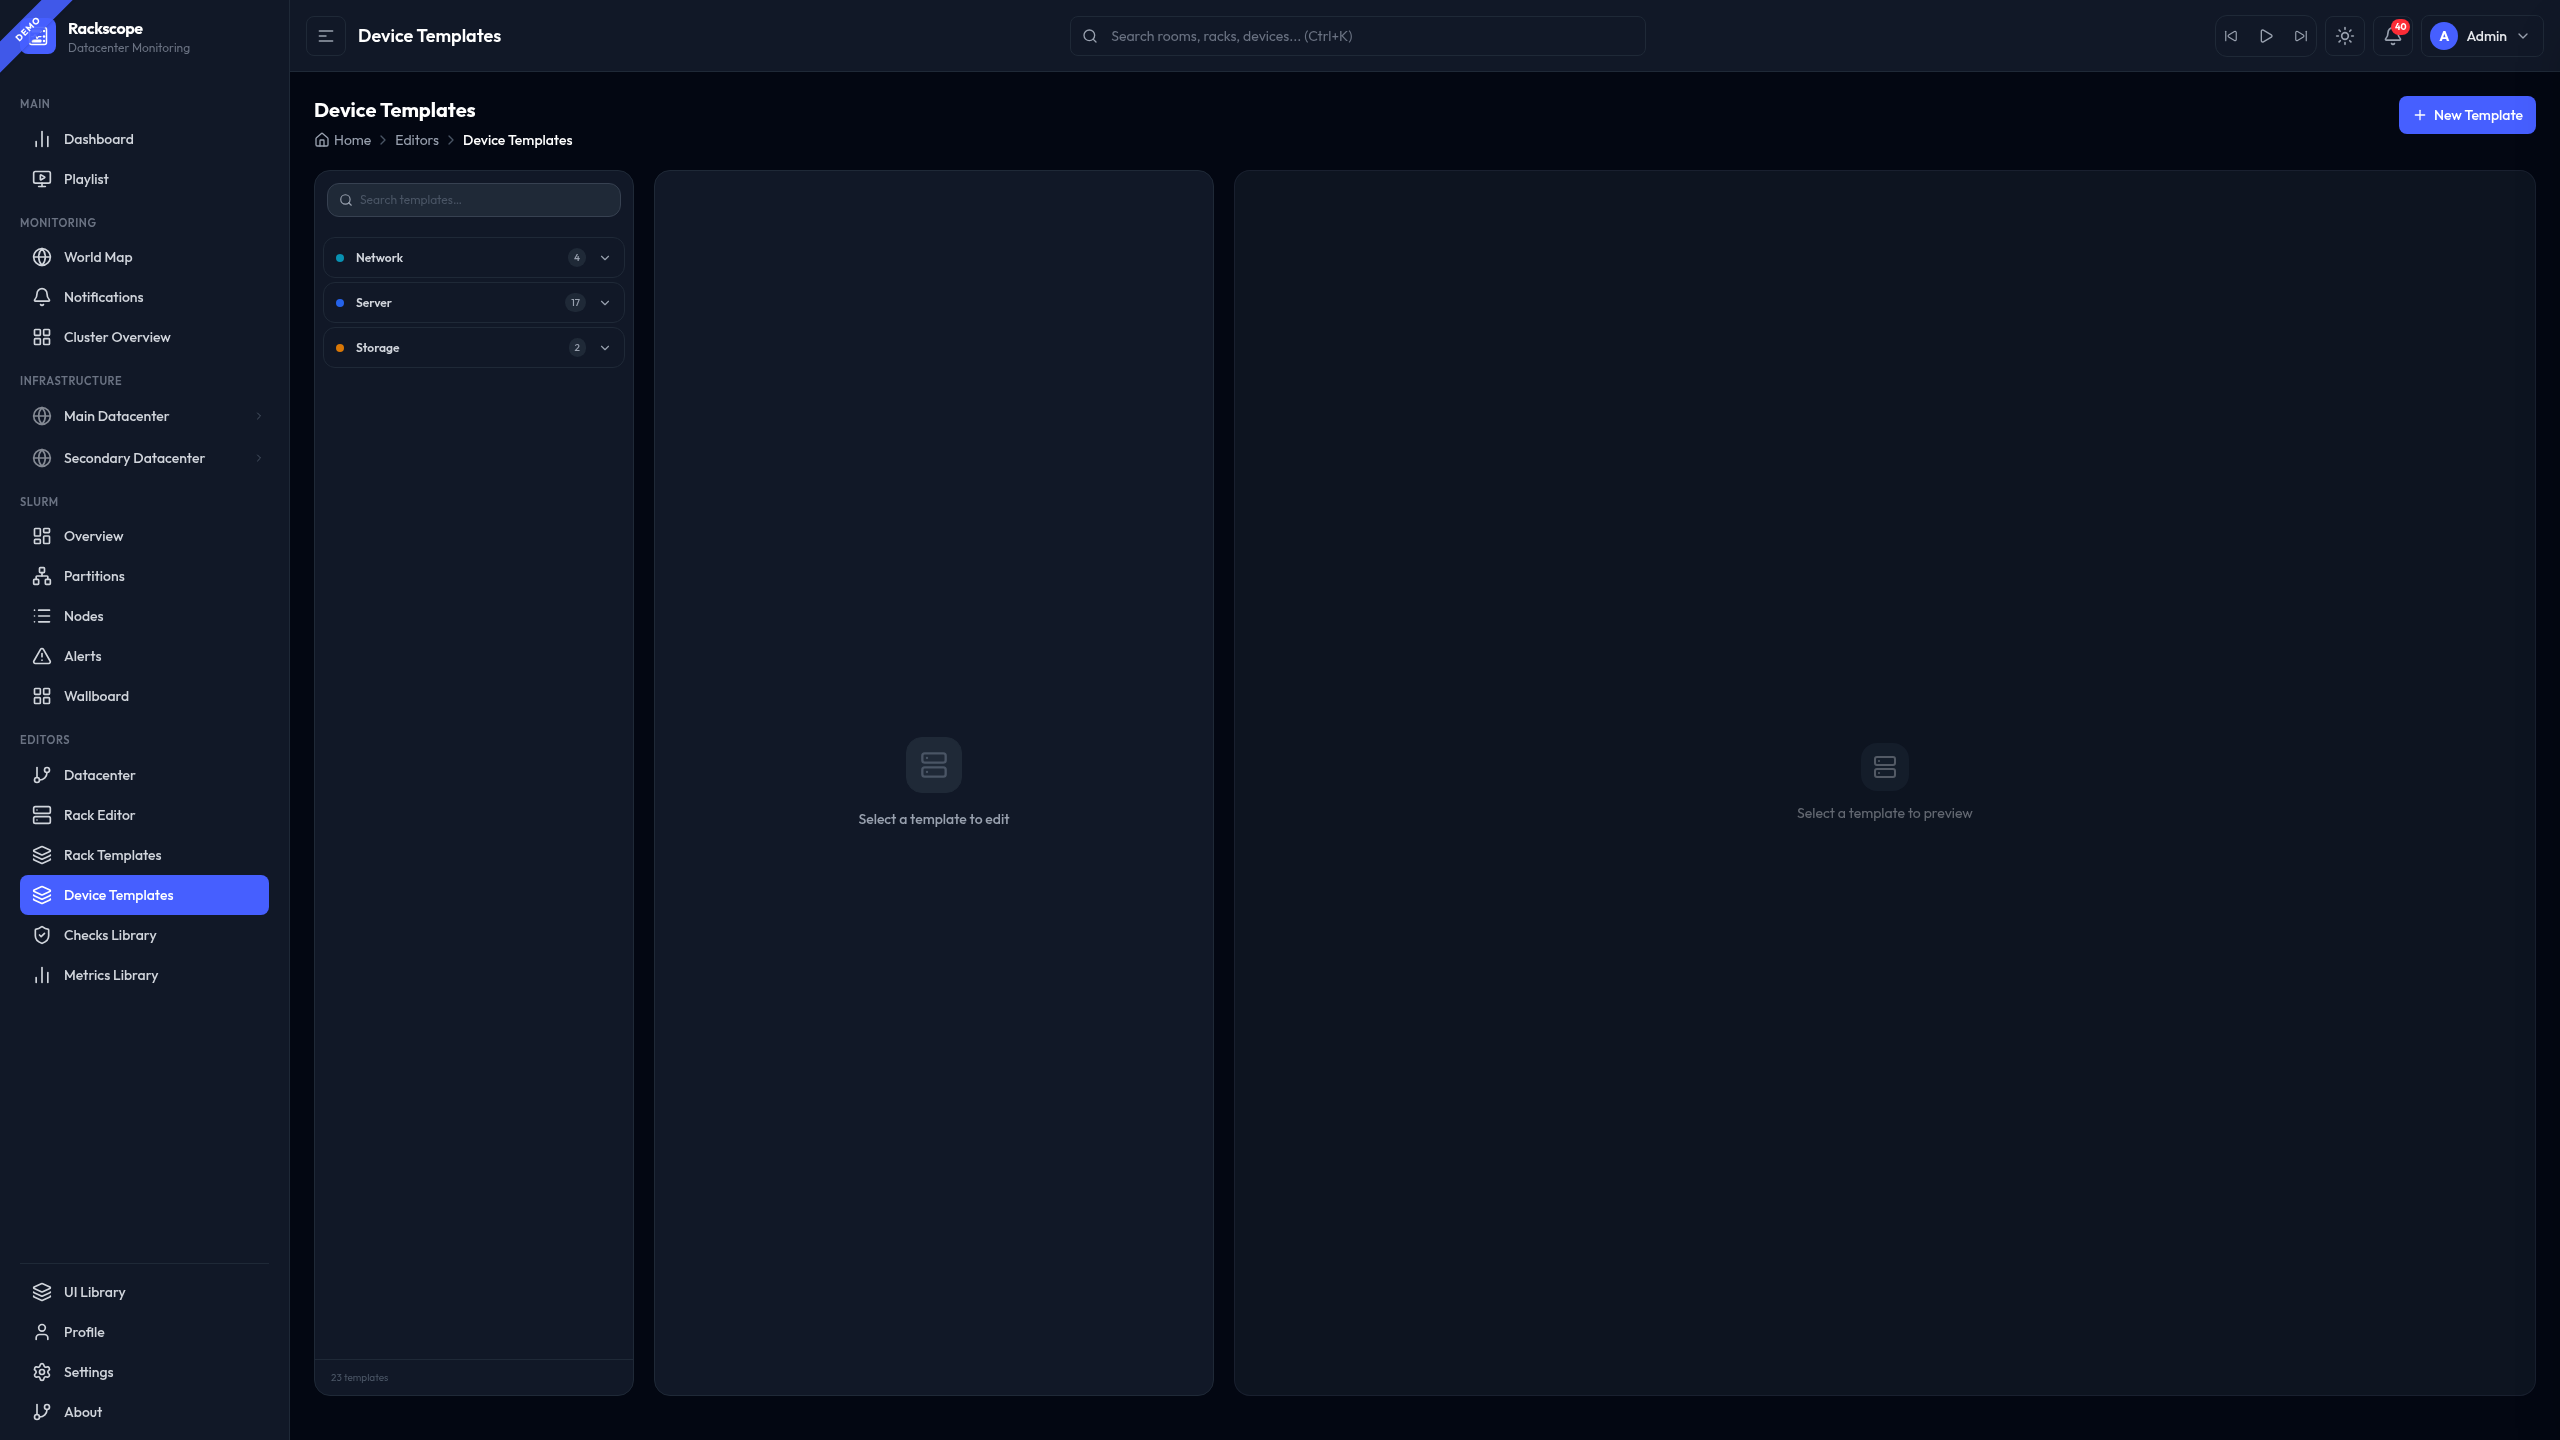
URL: /editors/templates
Key Template Fields
templates:
  - id: bs-x440-compute-2u-2n
    name: BullSequana X440 Compute (2U 2 Nodes)
    type: server          # server | switch | storage | pdu | cooling
    role: compute         # Optional: compute | visu | login | storage | network
    u_height: 2           # How many U slots this device occupies
    layout:
      type: grid
      rows: 1
      cols: 2
      matrix:
        - [1, 2]          # Visual slot arrangement (slot numbers)
    checks:
      - node_up
      - node_recent_reboot
      - ipmi_up
      - ipmi_fan_speed_state
    metrics:
      - node_cpu_usage
      - node_temperature
      - node_power
The layout.matrix controls how slots are arranged in the rack visualizer. For a 1U 2-node chassis, the matrix [[1, 2]] places node 1 on the left and node 2 on the right within the same U slot row. For a 2U 4-node chassis, the matrix [[1, 2], [3, 4]] places nodes 1–2 in the upper half and nodes 3–4 in the lower half.
To edit a template:
- Open
/editors/templates - Select the template from the left panel (filtered by type: Device / Rack / Component)
- Edit the YAML in the Monaco editor
- Click Save
Saving and Reloading
All changes made through the visual editors are written directly to the YAML files in the config/ directory. The backend automatically reloads the affected configuration file after each successful save. You do not need to restart the backend or any containers.
Reload behavior by editor:
| Editor | Files modified | Auto-reload |
|---|---|---|
| Topology Editor | config/topology/**/*.yaml | Yes — topology reloads on save |
| Rack Editor | config/topology/…/racks/{rack_id}.yaml | Yes — topology reloads on save |
| Templates Editor | config/templates/**/*.yaml | Yes — catalog reloads on save |
| Checks Editor | config/checks/library/*.yaml | Yes — checks library reloads on save |
| Settings | config/app.yaml | Yes — app config reloads on save |
After saving, health states update on the next planner refresh cycle. The default cache TTL is 60 seconds; you may see stale states for up to 60 seconds after a topology change.
If you need to force an immediate reload (for example after manually editing YAML files outside the editor), restart only the backend container:
docker compose restart backend
Equivalent YAML Structure
The following shows the complete YAML representation of a typical rack with devices, as created through the editor. This is what the file on disk looks like after saving.
# config/topology/datacenters/dc1/rooms/room-a/aisles/aisle-01/racks/r01-01.yaml
id: r01-01
name: Rack XH3000 Compute 01
template_id: bull-xh3000
aisle_id: aisle-01
devices:
  - id: r01-01-ib
    name: IB Switch XH35MQ
    template_id: bs-xh35mq-ib-1u
    u_position: 12

  - id: r01-01-c01
    name: XH3140 Trio 01
    template_id: bs-xh3140-trio-1u-3n
    u_position: 1
    instance: compute[001-003]

  - id: r01-01-c02
    name: XH3140 Trio 02
    template_id: bs-xh3140-trio-1u-3n
    u_position: 2
    instance: compute[004-006]

  - id: r01-01-c03
    name: XH3140 Trio 03
    template_id: bs-xh3140-trio-1u-3n
    u_position: 3
    instance:
      - compute007
      - compute008
      - compute009
All YAML files are stored under config/topology/ in a segmented directory layout: one directory per site, one subdirectory per room, one per aisle, and one file per rack. This keeps files small and makes git diffs focused on the specific rack or aisle that changed.
Tips and Best Practices
Use device templates consistently
Create a template for each distinct hardware model, then reuse the same template_id across all racks that have that model installed. This way, adding a new check to the template instantly activates it on every device of that type across your entire infrastructure.
Collision detection
The Rack Editor prevents you from placing two devices at overlapping U positions. If you try to place a 2U device at U position 5 when another device already occupies U 5 or U 6, the editor will show an error and refuse to save. Always check the rack view after adding multiple devices to verify the final layout.
Prefer pattern notation for large node counts
For racks with high-density chassis (3-node, 4-node modules), the pattern notation "compute[001-030]" is far more maintainable than an explicit list of 30 node names. Patterns also make it immediately obvious what the node naming convention is.
Role field for Slurm filtering
Set the role field on device templates to enable workload-manager filtering in the Slurm views:
| Role | Description |
|---|---|
compute | Standard batch compute nodes |
visu | Visualization / GPU nodes |
login | Login / front-end nodes |
storage | Storage servers |
network | Network equipment (switches) |
The Slurm Wallboard can filter to show only compute nodes, hiding infrastructure devices like PDUs and switches that do not participate in the batch queue.
Import from CMDB
If you manage your infrastructure in an external CMDB (NetBox, RacksDB, BlueBanquise), you can use importers to generate the YAML files programmatically instead of using the visual editor. Rackscope is designed as a visualization layer: the YAML configuration is the interface, and any tool that produces valid YAML can feed into it. Refer to the Admin Guide for importer documentation.